Danske ID activation

Step 1: Select United Kingdom and press start
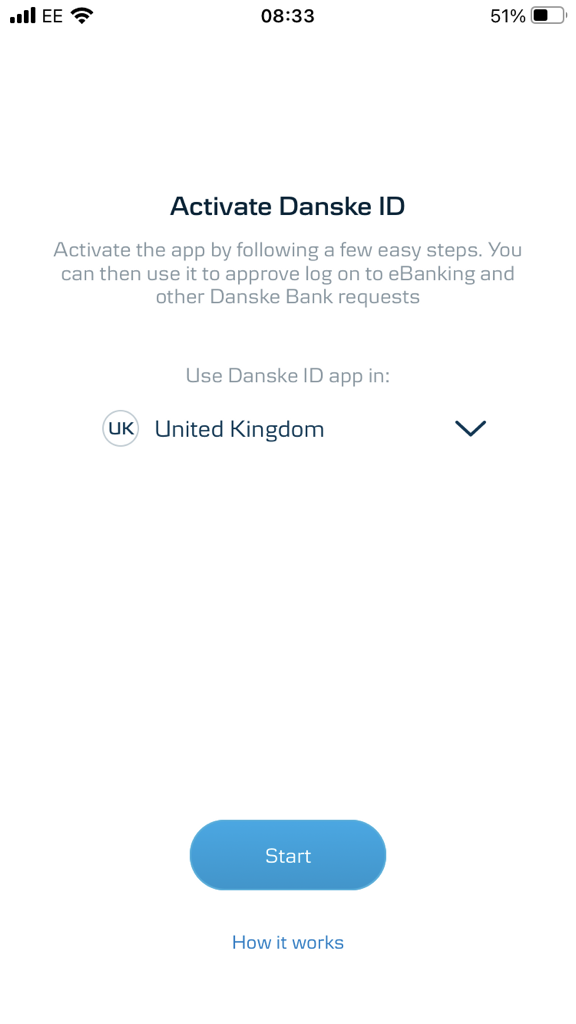

step 1 - select UK and press start
  • step 1

    Step 1: Select United Kingdom and press start


    step 1 - select UK and press start
  • step 2

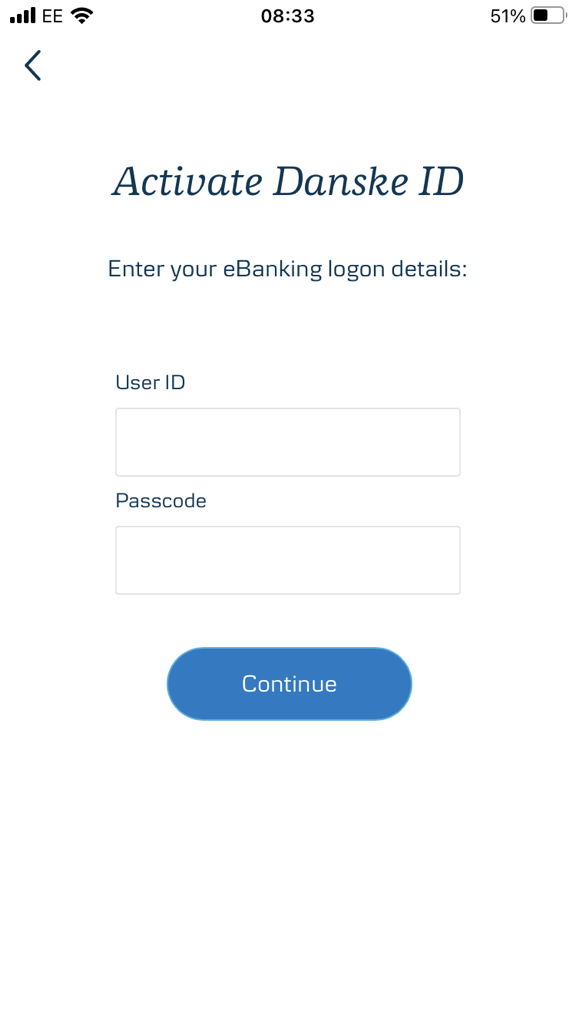
    Step 2: Enter eBanking user ID and passcode then press continue


    Step 2: Enter eBanking user ID and passcode then press continue
  • step 3

    Step 3: Select a method to activate Danske ID, either using your eSafeID device or by SMS


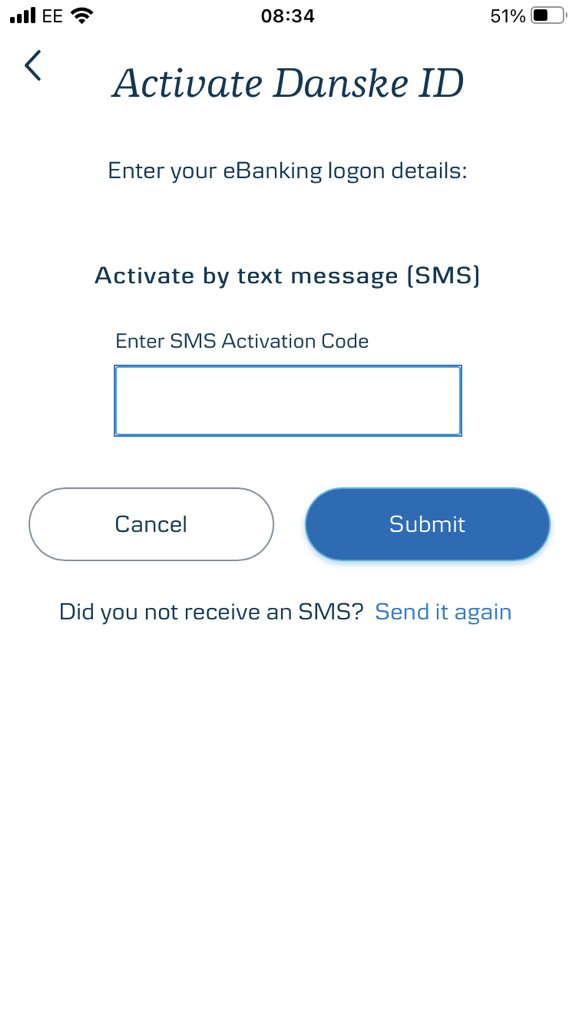
    Step 3: Enter code received by SMS
  • step 4

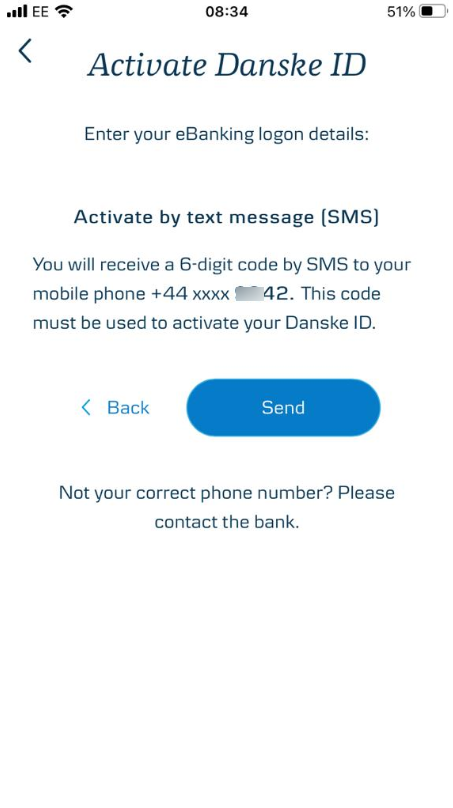
    Step 4: If activating via SMS, check the number shown on screen and if correct, press 'send' to receive an SMS


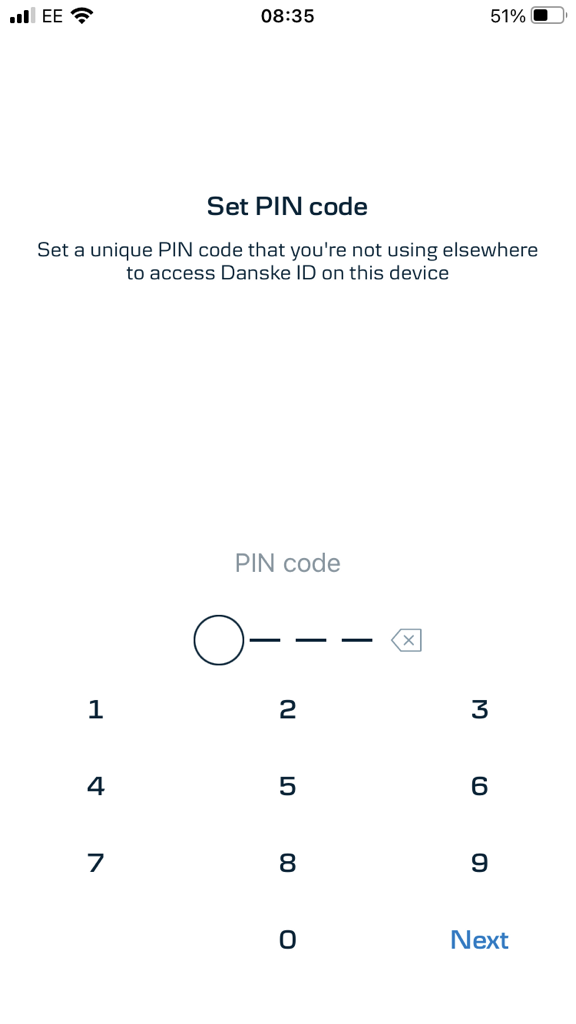
    Step 4: Set up a PIN code for Danske ID
  • step 5

    Step 5: Enter code received by SMS and press 'Submit'


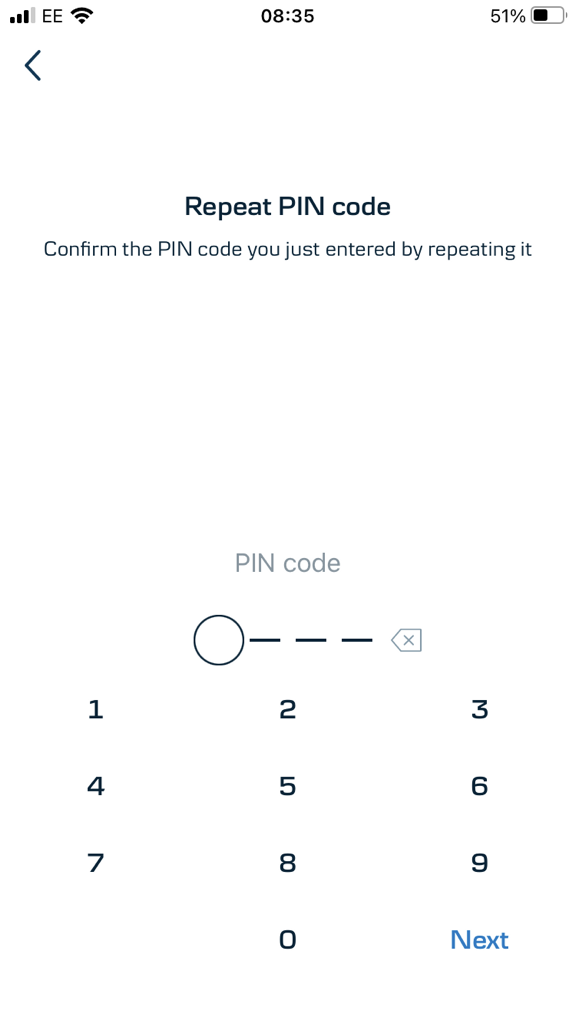
    Step 5: Repeat PIN
  • step 6

    Step 6: Set up a PIN code for Danske ID (separate to your eBanking passcode)


    Step 6: Add Biometric logon if available
  • step 7

    Step 7: Repeat PIN to confirm


    Step 7: Activation successful
  • step 8

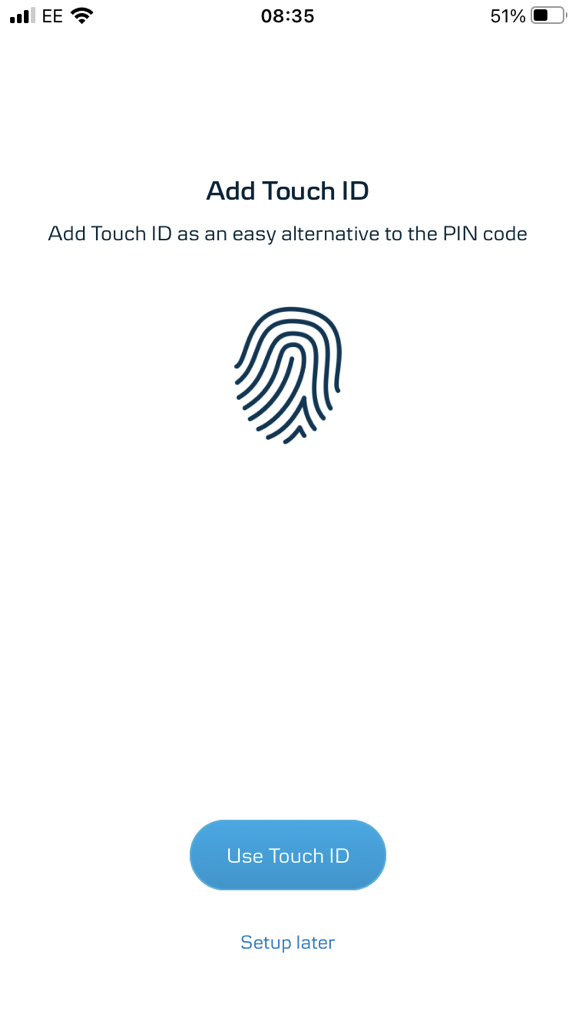
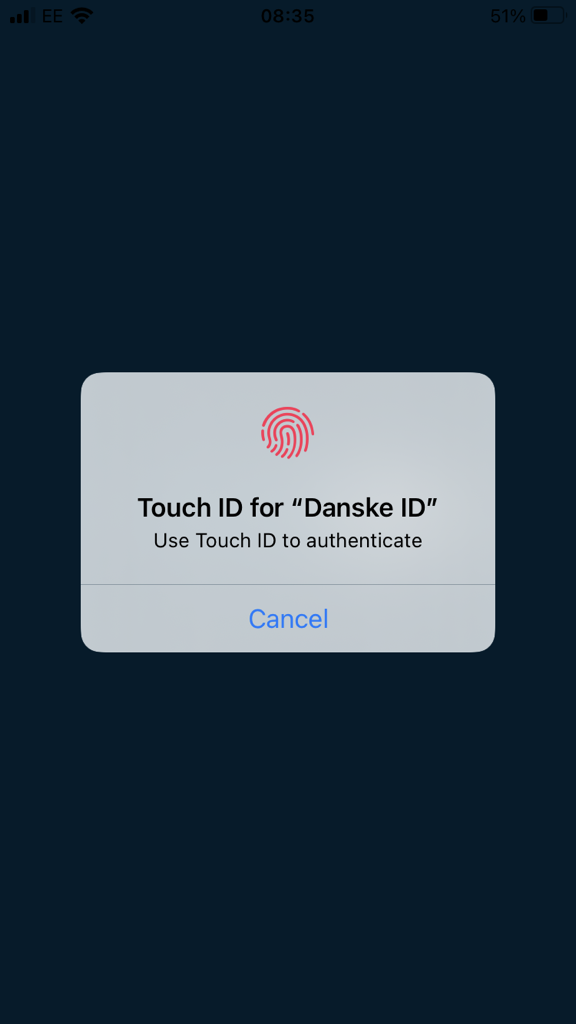
    Step 8: Add your fingerprint to logon, if available


    Step 8: Add your fingerprint to logon, if available
  • step 9

    Step 9: Add your fingerprint to logon, if available


    Step 8: Add your fingerprint to logon, if available
  • Step 10

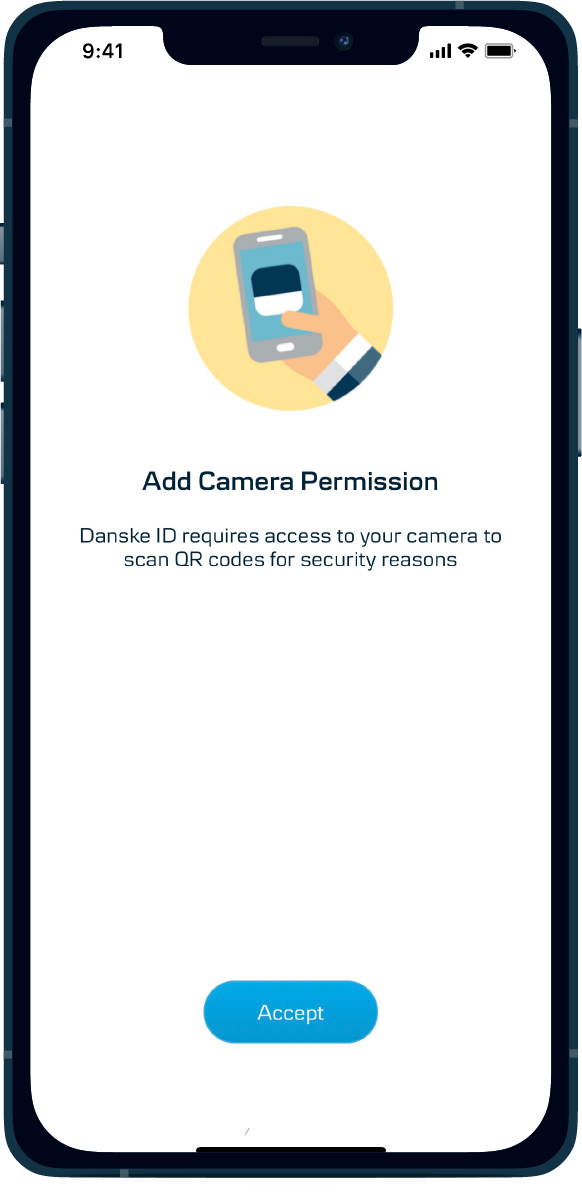
    Step 10: Camera permissions

    Danske ID requires access to your camera for QR code scanning for Business Customers using District. Please allow access to the camera before logging on with Danske ID.

    Step 10: Activation successful
  • step 11

    Step 11: Activation successful


    Step 10: Activation successful
Content is loading
Show more rows: All table rows are already visible for screen readers.
Show less rows: All table rows are already visible for screen readers.